Git Merge develop to main in an Azure DevOps Release
By Anatoly Mironov
This post is a techy one. It’s about running git commands in Azure DevOps Releases in order to finalize a deployment job to production.
Let me first describe our scenario:
We use Azure DevOps for code and for deployment. Our branch strategy a simplified Gitflow model, where all the current work is merged to the “develop” branch. The code from the “develop” branch is then built and released to staging environments and production. After a release to Production and regression tests the develop branch needs to be merged into the “main” branch (or “master”). So simply put, the git merge into main is what we mean by finalizing a production release.
The “Finalize” stage in a release definition consists of one step: a bash script. But before you can run git commands you need to configure a couple things. Let’s go through them:
Step 1: Permissions
Step 2. New Stage
Next, create a new stage, call it “Finalize Production Deployment” (or other name of your choice). On the Build Agent step, enable “Allow scripts to access the OAuth token”
Add a step: Bash, call it “Git - merge changes to main”. Paste this git code.
That’s it, the code is pretty universal. Let me know if something does not work.
You can stop reading unless you want more details :)
More details
A neat list of all available variables
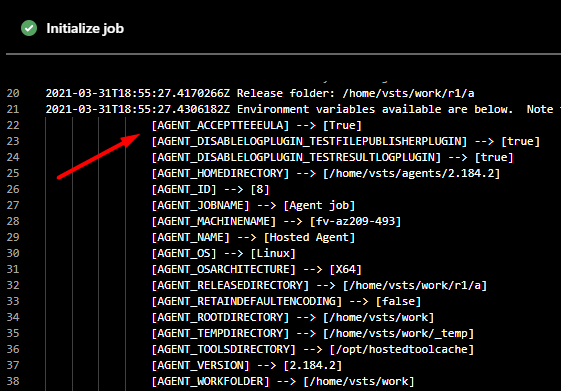
When I started working I found this very useful: The built-in “Initialize job”. Click on that:
There you can find all the built-in and your variables in a nice list. Pretty useful for building a bash script:
Here is how I construct the repo url, neat, isn’t it?
Pipelines vs. Releases
If you run this code in a classic Release Definition, you won’t get the repo. You need to clone it first. Why Release and a Pipeline. Well, due to reasoning described in my other blog post, we still run Releases: Azure Key Vault vs. Pipeline Variables. But Pipelines should work, too.
Dry-run
I found it useful while mickle-mackling with the finalize step, disable all the other steps and commenting out the actual push to origin. That way I could run it fast and focus on the steps I needed to fix first.
Authorization
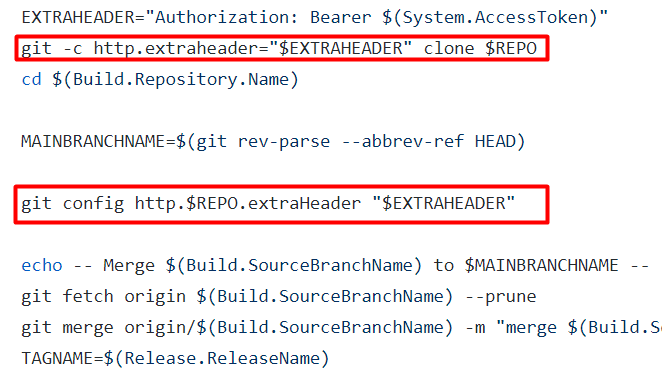
Before you can configure the authorization header, you need to clone it first and cd into that directory. In order to clone it you need to have the extraheader. Tough luck? No, not at all, you just need to add in two places, when cloning and and then in the git repository for all the following commands:
'
User Identity
Using git config you can define any user identity. Use something that makes sense and is easy to recognize.
main vs. master
If your repos main branches are both main and master, no worries, you don’t need to guess or create a variable. All you need to do is to check the current branch after you have cloned it. NB: it’s different in case you use a Pipeline.
Further reading and links
- How to authorize when cloning a repo
- How to grant permissions to the Build Service
- How to commit code from a release and troubleshoot it
Comments from Wordpress.com
Dettifoss IT Solutions - Oct 1, 2021
great post, thanks for sharing. Azure DevOps training in Hyderabad
i have read this blog and found it very helpful, thanks for sharing. Azure DevOps training in Hyderabad


