My WSL Setup
By Anatoly Mironov
This is my installation of Windows WSL and SharePoint Development Environment. The procedure and technology is ever-changing, the details might change, but the process is worth documenting, at least for myself, this is a working guide as of writing (2021-12-20).
Installing Windows Terminal
Installing Windows Terminal is not a prerequisite, but it will make your life much easier. Open Windows Store and search for Windows Terminal and click on Install.
Installing WSL 2
Installing WSL has never been easier than now. For that you only need to run a command in terminal as an Administrator and restart your computer:
wsl --install
This will install Ubuntu (20.04, the LTS version) on your Windows.
When restarted, it will prompt you for a Linux account, follow the instructions.

Open Terminal, open a new tab with Ubuntu, and there you go.
Before continuing make sure your system is up-to-date by running this command:
sudo apt update && sudo apt upgrade -y
And last but not least, install the build-essential package, this will be required for spfx on linux.
sudo apt install build-essential -y
Installing nvm
This is also optional, but very recommended, with Node Version Manager (a.k.a. nvm) you can easily switch between node versions. This is actually a must when you work with SPFx.
To install nvm on WSL, follow the steps here by copying and pasting a bash command in the WSL Terminal:
curl -o- https://raw.githubusercontent.com/nvm-sh/nvm/v0.39.1/install.sh | bash
After that, close and re-open Ubuntu Terminal.
Installing node
The latest LTS Node is 16.x.x (a.k.a. gallium), but this won’t work with SPFx. We need to use the previous LTS version - 14.x.x (fermium).
Run this command to install and use the fermium Node:
nvm install lts/fermium
Installing SPFx
Install the global packages needed for SPFx by running this npm command in WSL Terminal:
npm install gulp-cli yo @microsoft/generator-sharepoint --global
Creating SPFx project
There are two locations where you could create a new SPFx project, either on the mounted Windows User space () or in the Linux home folder (/home/{username}). The latter option is much faster, but the first version would make it easier to switch back and forth from Windows to Linux while working with git and vs code.
Eitherway, navigate to your folder and run this command to start a new project:
yo @microsoft/sharepoint
| Directory | Path | Time to create spfx |
|---|---|---|
| Windows User | /mnt/C/Users/mirontoli/source/repos |
11 m |
| Linux user | /home/mirontoli/Workspace |
2 m 40 s |

Editing in VS Code
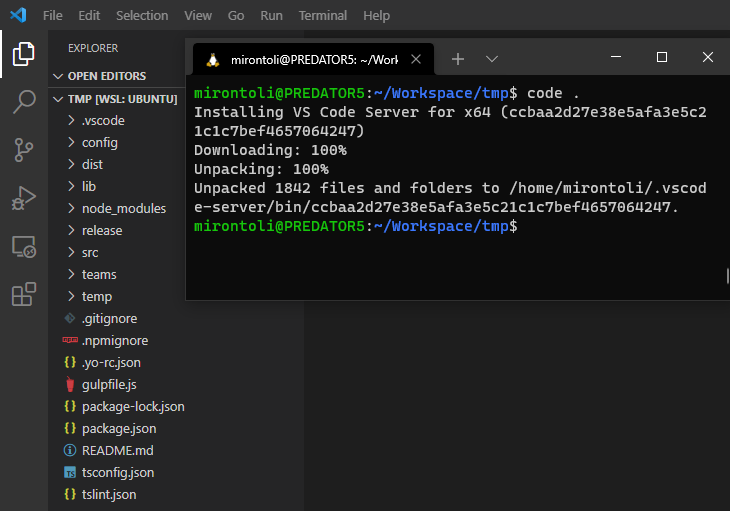
VS Code works even from WSL, no problems at all. Just execute:
code .

Installing development SSL Cert
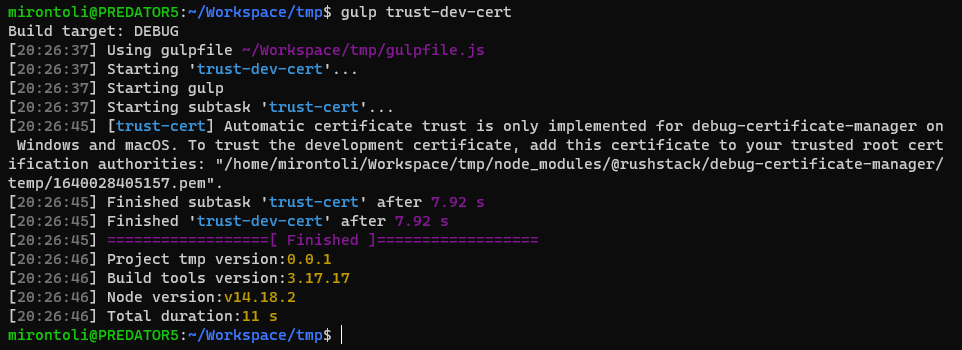
The SSL Cert is the trickiest part of this guide, but thanks to Don Kirkham’s post it is doable. First, in the spfx project, run this command:
gulp trust-dev-cert

This will create a new self-signed certificate
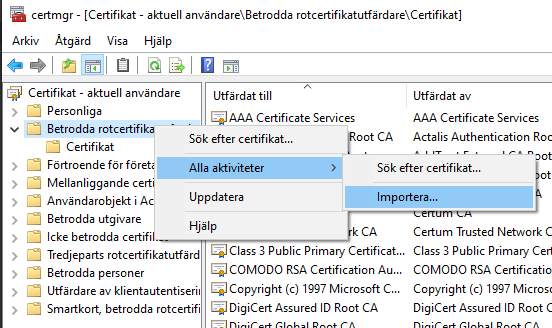
Next, in Windows, Press Windows+R and type certmgr.msc to start Certificate Mananager for Current User. Right-click Trusted Root Certification Authorities, Choose All Activities and then Import.
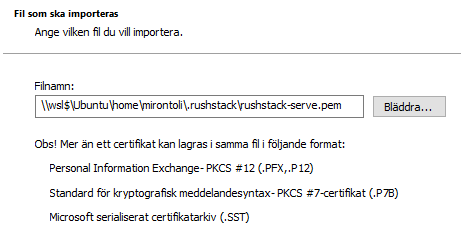
Paste the following path:
\\wsl$\Ubuntu\home\{your-linux-username}\.rushstack\rushstack-serve.pem

And click Import. After that you can verify that it works by starting the app (gulp serve) and navigating to https://localhost:4321.
Connecting to Azure DevOps
The easiest way to connect to Azure DevOps is using Git Credential Manager (GCM), set it up by running this command:
git config --global credential.helper "/mnt/c/Program\ Files/Git/mingw64/libexec/git-core/git-credential-manager-core.exe"
git config --global credential.https://dev.azure.com.useHttpPath true
Bonus 1: better shell
ZSH and OhMyZSH will make you as a developer a bit happier. This is absolutely not a must, but an appreciated nice-to-have indeed.
In your terminal run the following:
sudo apt install zsh -y
sh -c "$(curl -fsSL https://raw.githubusercontent.com/ohmyzsh/ohmyzsh/master/tools/install.sh)"
Bonus 2: DNS and VPN
On my work computer I could not install or update anything because the DNS could not resolve any domains. There are two options, either use some public DNS, such as 8.8.8.8 or find out your internal DNS server. I prefer my own internal DNS, because that would resolve the internal domain names, too.
In Windows PowerShell, run this:
nslookup
Note the ip address, in my case 192.168.8.1.
Then run the following commands as described in a discussion thread on Github.
sudo rm /etc/resolv.conf
sudo bash -c 'echo "nameserver 192.168.8.1" > /etc/resolv.conf'
sudo bash -c 'echo "[network]" > /etc/wsl.conf'
sudo bash -c 'echo "generateResolvConf = false" >> /etc/wsl.conf'
sudo chattr +i /etc/resolv.conf
This will remove the symbolic link and auto-update of the configuration by WSL.
Starting over
The good part of this setup is you can start over whenever you want, just remove the Ubuntu app and install it again. This is useful if you mess up your configuration. This can help you keep your Windows OS clean.
The whys
Speaking of the advantages, there are a few of them.
- As mentioned above, it helps you keep your main OS tidy and clean, and you can start over easier
- You can use the linux commands as they are, and not trying figure out why curl and other commands work differently on Windows
- SPFx setup works faster
- You can try out builds on your computer, the same way as it is on many pipelines on Azure DevOps, Netlify, and others.
