Deploying SPFx using Office 365 cli, custom AAD App and Azure Pipelines
By Anatoly Mironov
In this post I would like to share some findings from setting a deployment of SPFx. In my work:
- I need to deploy SPFx solutions using Azure Pipelines
- I need to use the least privileges/permissions
- I cannot use Legacy Authentication
First of all, big thanks to @waldekm and the whole community of @office365cli and @m365pnp for the quick help, and that outside working hours.
Let’s take a look at the setup piece by piece
Least Privileges
I followed this guide to set up a custom App Registration for Office 365 CLI in order to use the least privileges:
- Using your own Azure AD identity with Office 365 CLI (developer.microsoft.com/blogs)
Custom Azure AD App
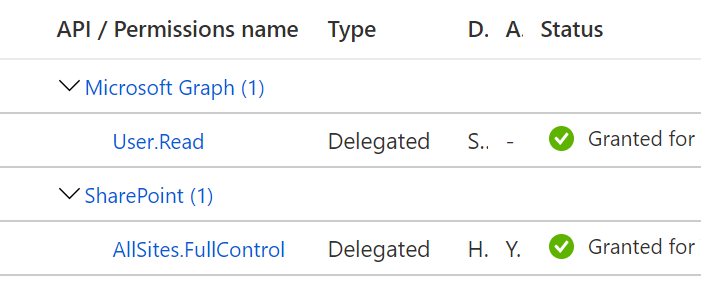
For uploading and deploying SPFx packages I found these permissions to be the bare minimum:
- Delegated Microsoft Graph User.Read
- Delegated SharePoint AllSites.FullControl

Service Account
The second part is the service account that just has access to one site collection - Tenant App Catalog. That plus Delegated AllSites.FullControl of the app registration narrows the access to just that site. To install apps the Uploader Account needs to be Site Collection Administrator.

Least privileges for SPFx Upload & Deploy
Azure Pipelines
In our project we use Azure Pipelines where we also define the release using .yml. The deployment consists of series of bash inline scripts.
I am not going to describe all the steps for setting up node, npm and installing the office 365 cli. If you already have used Office 365 CLI with the default AAD APP it might look like this:
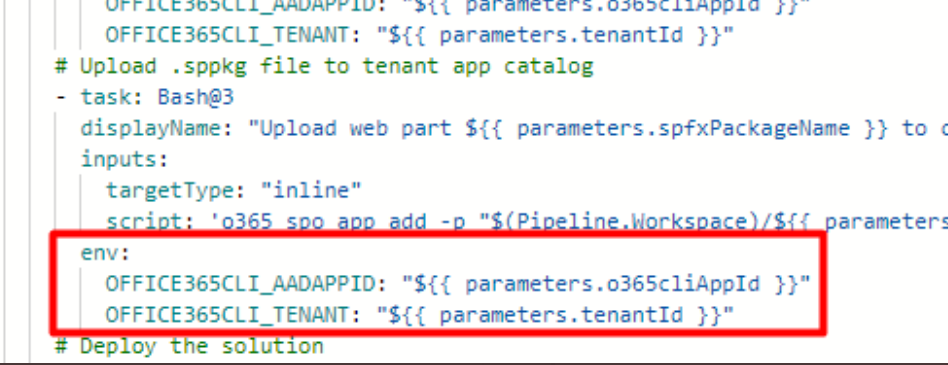
Now comes the tricky part! If you followed the guide mentioned above, you must have noticed the two environment variables that you need to have:
That’s straight forward when you run the cli in your own console. But the fact is (or at least from what I can see), you cannot “export” variables to other pipeline tasks.
Instead of setting the variables in the inline script, we can take advantage of the Bash task parameter called env:.

Some other findings:
- Office 365 CLI needs them in all three commands:
login,spo app add, andspo app deploy - If you create and export a variable in a pipeline task, it won’t persist, because every task starts a new shell session.

That means that we need to provide environment variables in every task in the pipeline, that uses Office 365 CLI with a custom Azure AD App. Or is there a better way? Anyway, the version below (the same tasks plus `env`) will work:
Eliminating Legacy Authentication
My goal is to remove the need of legacy authentication. Previously we installed spfx packages using PnP PowerShell. PnP PowerShell in Pipelines causes Legacy Authentication, it can be solved, though:
- Blocking Legacy Authentication
- How to set up deployment of spfx with PnP and certificates to use Modern authentication.
Using Office 365 CLI rather than PnP PowerShell with a certificate has some significant benefits:
- Office 365 CLI is multi-platform, you can reuse the scripts. PnP PowerShell requires Windows (yet, but still).
- Setting up certificates and using it in the deployment process is a bigger initial task.
Release Pipelines
Just for completeness, in a classic release pipeline, you can use a bash script to upload and deploy an app:

In our example we also send data to Azure CDN using Azure CLI: